Dill is one of the most rewarding herbs you can grow — but harvesting it well is a skill of its own. Pick too early, and you miss out on flavor. Wait too long, and the plant bolts and turns bitter. This guide walks you through every stage of the dill harvest, from the first tender fronds to the final seed collection.
Whether you're growing dill in raised beds, containers, or a full kitchen garden, the principles are the same: pay attention to the plant, harvest often, and give it the nutrition it needs to keep producing. Trusted by growers since 2008, GS Plant Foods was built around exactly that philosophy — that with the right inputs and the right timing, any gardener can grow herbs with exceptional flavor and yield.
Let's get into it.
Understanding the Dill Plant Before You Harvest
Dill (Anethum graveolens) is an annual herb in the carrot family. It grows fast — germinating within 10–14 days and reaching harvestable size in as little as 40–60 days. But it's also a "bolting" plant, meaning it's biologically programmed to race toward flowering and seed production once conditions are right (usually when days get long and temperatures rise).
Understanding this lifecycle is the key to timing your harvest. There are three distinct parts of the dill plant worth harvesting:
- Fronds (leaves): The feathery, blue-green foliage with the classic fresh dill flavor. Best harvested young.
- Flowers (umbels): The flat-topped yellow flower clusters. Milder than the leaves, excellent for pickling and vinegars.
- Seeds: Formed after the flowers dry out. Strong, aromatic, used in breads, pickles, and spice blends.
Each stage has its own best harvest window — and missing one doesn't mean you've lost everything. A well-cared-for dill plant gives you multiple opportunities throughout the season.
| Stage | Days After Germination | What to Look For | Best Harvested For | Window |
|---|---|---|---|---|
| Seedling | 10–25 days | 2–4 feathery leaves, 3–5" tall | Microgreens, delicate garnish | Narrow — 1–2 weeks |
| Young Plant | 25–50 days | 6–12" tall, multiple branches, bright green fronds | Fresh cooking, salads, dips | Best flavor window |
| Pre-Bolt | 50–65 days | 12–18" tall, central stalk thickening, fronds slightly coarser | Larger batches for drying or freezing | Still excellent |
| Flowering | 65–80 days | Yellow umbel flower clusters forming | Pickling, infused vinegars, floral garnish | Changing flavor profile |
| Seed Set | 80–110 days | Flowers drying, seeds turning tan/brown | Dill seeds for spice or next season | Harvest before seed drop |
When Is Dill Ready to Harvest?
The single most important rule of harvesting dill: don't wait until you need it. By the time you're reaching for it to garnish a dish, the plant may already be past its peak. Instead, make harvesting a regular, proactive habit.
Signs That Dill Leaves Are Ready
- The plant is at least 6 inches tall with multiple sets of fronds
- Foliage is a deep blue-green color — pale or yellowish leaves indicate nutrient stress
- The fronds smell strongly of fresh dill when you brush them lightly
- The plant has at least 4–5 healthy side branches before you take any
Signs That Flowers Are Ready
- The umbel is fully open but still yellow — avoid brown or dried-out heads
- Harvest on a dry morning before full sun hits — the volatile oils are most concentrated then
Signs That Seeds Are Ready
- The seed heads have turned from green to tan or light brown
- When you rub a cluster gently, seeds fall free without force
- Don't wait until they're completely brown — seeds can shatter and drop before you get there
Morning is always the best time to harvest dill. The essential oils that give dill its flavor are most concentrated in the cooler morning hours. By midday heat, some of those volatile compounds have already off-gassed. A morning harvest makes a measurable difference in flavor intensity, especially for drying.
What You'll Need
Dill harvesting doesn't require specialized equipment, but a few basics make a real difference in cut quality and plant health.
- Sharp scissors or pruning shears — clean, sharp blades cause minimal trauma to the plant and reduce disease risk. Avoid tearing by hand.
- A clean bowl or basket — keep harvested fronds cool and out of direct sun while you work.
- Paper towels or a damp cloth — for gently blotting moisture if harvesting after dew or light rain.
- Paper bags — for seed head collection (place the bag over the head before cutting so you catch loose seeds).
- Gloves (optional) — dill sap can cause minor skin sensitivity in some people, especially on sunny days (phototoxicity).
Before your first big harvest, give your dill a dose of Fish & Kelp Liquid Blend Organic. This organic combo feeds nitrogen for leafy growth while the kelp delivers natural growth hormones (cytokinins and auxins) that encourage more lateral branching, which means more harvestable fronds per plant. Apply 3–5 days before a major cutting and you'll notice the regrowth is faster and fuller.
Step-by-Step: How to Harvest Dill Fronds
This is the harvest you'll do most often — regular leaf harvests every 1–2 weeks that keep the plant in an active, vegetative state and delay bolting. Here's how to do it right.
-
1
Choose the right stems
Look for the longest, most developed stems with full, dark green fronds. These are the most mature and have the strongest flavor. Leave the smaller, newer growth at the base — that's your plant's future.
-
2
Cut above a node, not at the base
Cut each stem about one-third of the way down, just above where a leaf junction or side shoot is forming. This encourages the plant to branch from that point rather than just dying back. Never take more than one-third of the plant's total foliage in a single harvest.
-
3
Work from the outside in
Always harvest the outer, older stems first. The inner, younger growth should be protected to keep the plant's photosynthesis engine running. This outer-first approach is the same principle used by professional herb growers to sustain production for months.
-
4
Never strip the plant bare
It's tempting when the plant is lush, but over-harvesting causes stress, accelerates bolting, and can permanently weaken the plant. A good rule: after harvesting, your dill should still look like a full, healthy plant — just slightly smaller.
-
5
Harvest regularly to delay flowering
The more often you harvest, the longer you delay bolting. Dill bolts in response to stress and the cue to reproduce. Regular harvesting signals to the plant that it's still in a vegetative, productive state. Aim to harvest every 10–14 days during peak season.
-
6
Refresh with nutrients after each major harvest
After taking a significant amount of foliage, the plant needs to mobilize resources for regrowth. This is one of the best moments to apply a fast-acting liquid fertilizer. More on this below.
Harvesting Dill Flowers
Most home gardeners let dill flowers go to seed and never realize how useful the flowering stage is. The umbels — those flat, umbrella-shaped yellow flower clusters — have a flavor that sits between fresh dill and dill seed: aromatic, slightly sweet, with a pleasant complexity that's perfect for pickling cucumbers, seasoning fish, or infusing into vinegar.
To harvest flowers:
- Cut the whole flower stalk about 6 inches below the umbel while the flowers are still yellow and fully open
- Use them fresh the same day, or hang them upside-down in a paper bag to dry — the bag catches any seeds that fall
- For pickling, add whole flower heads directly to your jars — they're the secret ingredient in truly exceptional dill pickles
Dill flowers have a subtler, more floral flavor than the fronds. If you're making pickle brine, use one flower head per quart jar. The result is more complex and aromatic than leaf-only pickles — it's what sets homemade pickles apart from anything you'd buy at a store.
Harvesting Dill Seeds
Dill seeds are harvested at the very end of the plant's lifecycle. At this point, the plant has fully committed to reproduction, and the foliage flavor has declined significantly — but the seeds are intensely aromatic and store well for months.
-
1
Watch for color change
Mature seeds transition from green to tan or light brown. Check the seed heads daily once the flowers have fully dried, since the window between "ready" and "dropped" can be just a few days.
-
2
Use the paper bag method
Gently pull a small paper bag over the seed head and hold it in place with one hand. With your other hand, cut the stalk below the head. Invert the stalk into the bag and shake gently — most seeds will fall free. Leave the bag in a dry, warm place for 1–2 weeks to fully cure.
-
3
Clean and store
Shake the collected seeds through a fine mesh strainer to remove chaff and stem debris. Store in an airtight glass jar in a cool, dark location. Properly stored dill seeds maintain their flavor for up to 3 years.
-
4
Save some for replanting
Dill seeds are also the next season's seeds. Save a portion in a clearly labeled envelope in your refrigerator. They'll germinate well the following spring and cost you nothing.
Feeding Dill for Maximum Yield: A Fertilizer Strategy
Most gardeners focus entirely on the harvest technique and ignore the nutrition piece — then wonder why their dill produces sparse fronds, bolts early, or tastes bland. The truth is that a well-fed dill plant is a dramatically more productive dill plant.
Dill is a fast-growing leafy herb, which means it has a relatively high nitrogen demand. But unlike a heavy-feeding vegetable, it doesn't need aggressive fertilization — what it needs is consistent, balanced nutrition that keeps growth steady and stress low.
For peak leaf production, nitrogen is the key macronutrient, and Amino Power Powder delivers it in one of the most bioavailable forms possible. With 18 L-amino acids and chelating agents, nitrogen is taken up quickly by the plant without the salt stress of synthetic fertilizers. Apply as a diluted foliar spray early in the season when you want maximum leafy growth before the plant starts thinking about flowering. It's especially useful after a major harvest, when the plant needs to rebuild its foliage fast.
Fertilizer Timing Around the Harvest Cycle
Think of your feeding schedule as being structured around your harvest events, not just the calendar. Here's the framework that works best for herb growers:
| Timing | Plant Stage | Goal | Recommended Product | Application |
|---|---|---|---|---|
| At planting / germination | Seed to seedling | Strong root establishment | Root Ruckus! Turbo Charged Liquid Compost | Soil drench, diluted 1:10 |
| 3–4 weeks after germination | Young vegetative plant | Boost leafy growth, build biomass | Amino Power Powder (foliar or drench) | 1 tbsp per gallon, weekly |
| 3–5 days before harvest | Pre-harvest priming | Maximise flavor compounds, encourage branching | Fish & Kelp Liquid Blend Organic | Foliar spray or soil drench |
| Within 24–48 hrs after harvest | Post-harvest recovery | Fast regrowth, replace lost foliage | Amino Power Powder or Fish & Kelp | Light foliar, morning application |
| Mid-season, if yellowing occurs | Any stage | Correct calcium/magnesium deficiency | Cal-Mag Extreme | 1–2 tsp per gallon, soil drench |
| Late season (seed harvest prep) | Flowering / seed set | Support seed fill, don't push leafy growth | Organic Liquid Kelp Seaweed | Light foliar only |
Root Ruckus! is a liquid compost extract packed with beneficial microorganisms that colonize the root zone and dramatically improve nutrient uptake efficiency. Apply it at planting time and once more at the mid-season point, and your dill will be able to process all the nitrogen and minerals you feed it. Plants with active root microbiomes also show greater stress tolerance, which directly translates to a longer vegetative season before bolting.
How to Store Fresh Dill After Harvesting
Fresh dill is one of the more delicate herbs — the fronds begin wilting and losing aromatic compounds within hours of cutting. Proper post-harvest handling can extend usable life from 1–2 days to 1–2 weeks, and the right storage method depends on how quickly you plan to use it.
| Method | How To | Shelf Life | Best For | Flavor Retention |
|---|---|---|---|---|
| Refrigerator — Jar of Water | Stand stems in 1" of water, loosely cover tops with a plastic bag, refrigerate | 1–2 weeks | Using fresh within 2 weeks | Excellent |
| Refrigerator — Paper Towel | Wrap damp paper towel around stems, place in zip-lock bag in crisper | 5–7 days | Short-term fresh use | Very good |
| Freezing — Whole Sprigs | Wash, pat dry, lay flat on baking sheet to freeze, then transfer to bags | 3–6 months | Cooked dishes (soups, stews) | Good (texture changes) |
| Freezing — Chopped in Ice Cubes | Chop fronds, fill ice cube tray 2/3 full, top with water, freeze | 3–4 months | Adding to sauces, soups by the cube | Very good |
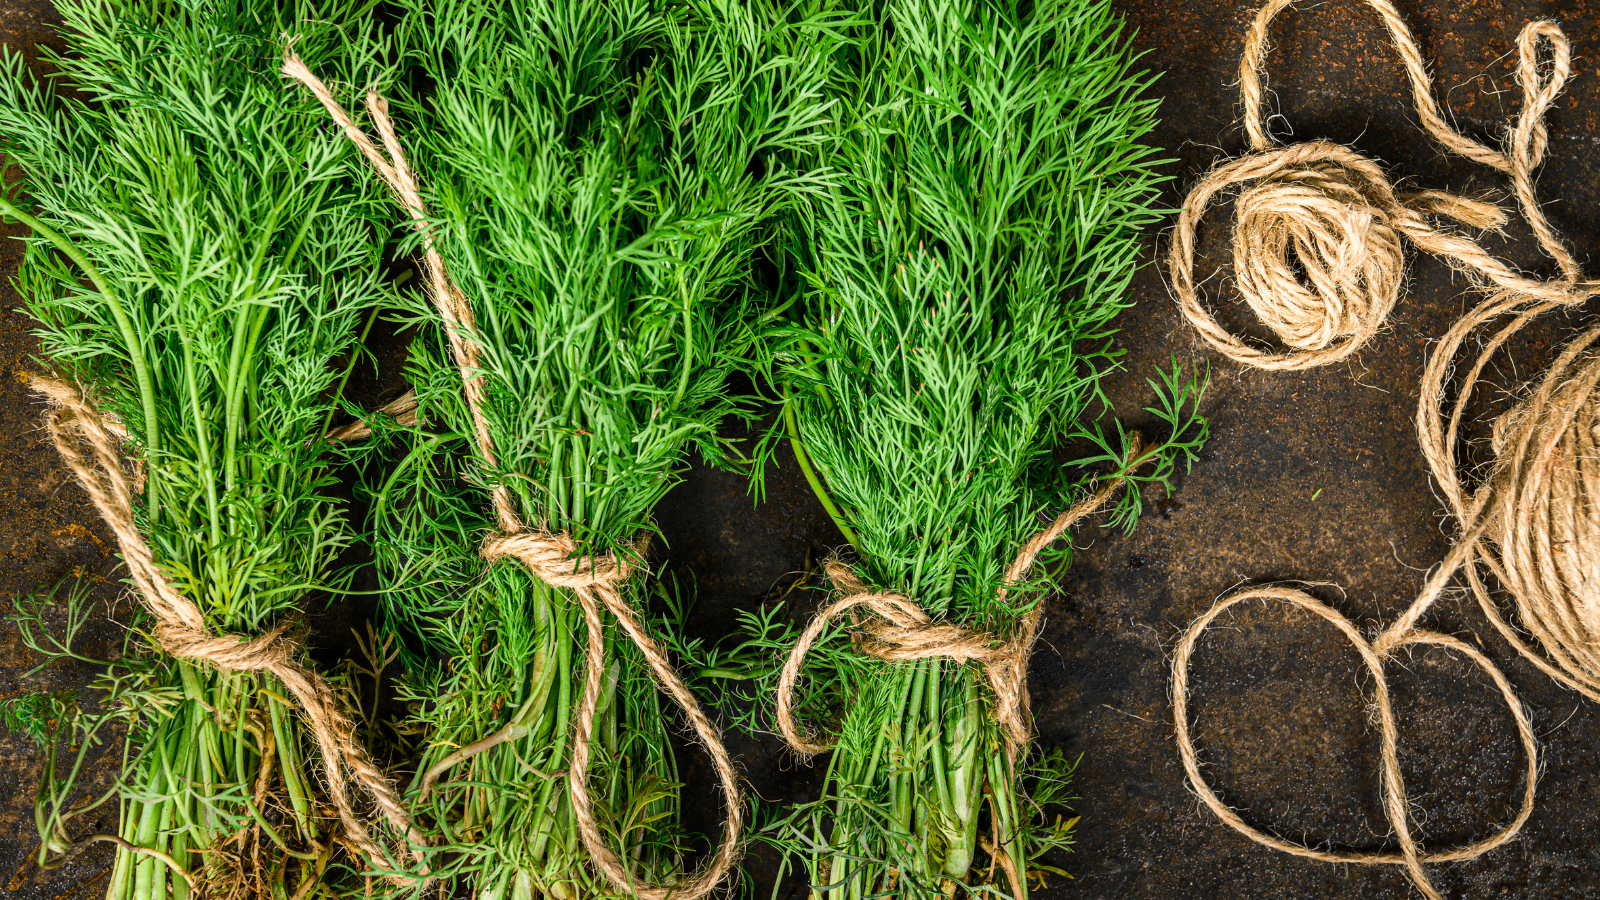
| Air Drying | Bundle 5–7 stems, hang upside down in warm, ventilated, dark space for 2–3 weeks | 12 months | Long-term spice cabinet storage | Good (different flavor) |
| Dehydrator | 95°F / 35°C for 2–4 hours until brittle | 12–18 months | Large batches, maximum shelf life | Good |
| Dill-Infused Oil or Vinegar | Pack fresh fronds into sterilized jar, cover with oil or white wine vinegar | 4–6 weeks (oil) / 3–4 months (vinegar) | Dressings, marinades, drizzling | Excellent (flavor transfer) |
Never wash dill before refrigerating — moisture accelerates decay. Wash it right before you use it. The only exception is if there's visible soil or debris that could trap bacteria during storage.
Dill Varieties and Their Harvest Differences
Not all dill is the same. The variety you're growing affects the flavor intensity, bolt resistance, and optimal harvest strategy. Here's a quick reference for the most commonly grown types:
| Variety | Height | Bolt Resistance | Best Harvest Use | Notes |
|---|---|---|---|---|
| Bouquet | 36–48" | Low | Seeds & flowers (pickling) | The classic variety. Bolts quickly — plan for seed harvest. |
| Fernleaf | 18–24" | High | Fresh leaves (extended season) | Dwarf variety, great for containers. AAS Award Winner. Best for continuous leaf harvest. |
| Dukat (Tetra) | 24–36" | Medium-High | Fresh leaves, culinary use | High leaf-to-stem ratio, intense flavor. Popular with chefs. |
| Hera | 30–36" | High | Continuous leaf harvest | Bred specifically for slow bolting. Excellent for succession planting. |
| Long Island Mammoth | 48–60" | Very Low | Seeds, large flower heads | Tall and striking. Classic pickling dill. Harvest seeds early — bolts fast. |
| Superdukat | 20–28" | High | Fresh leaves | Improved Dukat. Extra-dark foliage, very aromatic. Recommended for kitchen gardens. |
How to Keep Dill Producing All Season: The Succession Planting Strategy
One of the biggest frustrations with dill is the "feast or famine" cycle: the plant produces abundantly, then bolts, and you're left with nothing. The solution is succession planting — staggering plantings every 2–3 weeks so there's always a young, actively growing plant ready to harvest.
Here's how to implement a practical succession system:
- Start your first planting directly in-ground or in containers as soon as your last frost date passes.
- Every 2–3 weeks, sow another small batch — just a pinch of seeds in a designated spot or new container.
- When the first planting bolts, let it continue toward seed harvest rather than pulling it. Meanwhile, your second planting is entering its prime leaf-harvest window.
- By late summer, your third or fourth sowing will be producing into fall when temperatures cool and plants are naturally less prone to bolting.
A consistent feed program supercharges this system. Fast, uniform germination across all your successive batches depends on healthy soil biology and available micronutrients — which is where soil amendments come in.
If you're running succession plantings of dill, Organic Liquid Kelp Seaweed is one of the most cost-effective things you can add to your routine. Kelp is rich in natural plant growth regulators, especially cytokinins, which stimulate cell division and delay the aging process in plant tissue. For dill, this translates to slower bolting, more lateral branching, and a longer productive window from each planting. Use it as a seed soak before planting (15 minutes in diluted kelp solution) to dramatically improve germination rates, then as a monthly foliar spray throughout the season.
Common Harvesting Mistakes (and How to Avoid Them)
Even experienced gardeners make these mistakes with dill. Knowing them in advance saves you an entire season of disappointment.
Mistake 1: Harvesting Too Late
The biggest one. By the time dill has bolted and flowered, the foliage has already become more bitter and coarse. If you see the central stalk thickening and pushing upward fast, act immediately — harvest heavily before the plant redirects all its energy into flowers.
Mistake 2: Cutting Too Close to the Base
Cutting stems at the base removes the growth nodes the plant needs to regenerate. Always leave several inches of stem with at least one visible node or side shoot. This is the difference between a plant that rebounds in a week and one that struggles for three.
Mistake 3: Harvesting After Rain or Irrigation
Wet foliage is more prone to bruising, decay, and fungal problems after cutting. Wait for the leaves to dry out — or harvest the morning before you plan to water, rather than after.
Mistake 4: Ignoring Nutrient Stress Signals
Yellow lower leaves on dill almost always indicate nitrogen deficiency. Pale overall color with purple-tinged stems suggests phosphorus stress. Both situations weaken the plant before harvest and reduce flavor. Catch these early by doing a quick visual check each time you walk past your herb bed.
Calcium and magnesium deficiency is more common in herb gardens than most gardeners realize, especially in sandy soils or containers that get watered frequently. Symptoms on dill include yellowing between leaf veins (interveinal chlorosis) and fragile, breakable fronds. Cal-Mag Extreme corrects both deficiencies quickly and contains a supporting cast of micronutrients that improve overall plant health. Apply as a soil drench at 1–2 tsp per gallon every 2–3 weeks during the growing season.
Mistake 5: Over-harvesting in Hot Weather
When temperatures are above 85°F (29°C), dill is already under heat stress and much closer to bolting. Taking a heavy harvest during a heat wave pushes the plant over the edge. During hot spells, take lighter harvests and make sure the plant stays consistently moist at the root zone.
Mistake 6: Letting Seeds Drop Unintentionally
If you're growing dill near other garden beds, be aware that dropped seeds germinate prolifically and dill can become a volunteer "weed" in unexpected places the following season. This isn't necessarily bad — but if it's not intentional, harvest seed heads before they fully ripen and shatter.
Using Your Harvested Dill
Now for the best part. Dill is one of the most versatile herbs in the kitchen, and different harvest stages open up different culinary possibilities.
Fresh Fronds
- Stir into Greek yogurt with garlic for tzatziki
- Scatter over smoked salmon or gravlax
- Mix into potato salad, egg salad, or chicken salad
- Add to cream cheese for a simple herb spread
- Blend into butter for compound herb butter (freezes beautifully)
- Use as a finishing herb on roasted carrots, beets, or cucumbers
Dill Flowers (Umbels)
- Add whole heads to lacto-fermented pickles for authentic flavor
- Steep in white wine vinegar for dill vinegar (ready in 2 weeks)
- Use as a stunning garnish on platters and boards
- Infuse into olive oil for drizzling over seafood
Dill Seeds
- Toast lightly and crush over roasted vegetables
- Add to bread dough — classic in Scandinavian and Eastern European baking
- Use whole in pickling brines for a stronger dill note than the leaves alone
- Grind with coriander and pepper as a dry rub for salmon
Troubleshooting: When Dill Isn't Performing
Sometimes, despite best efforts, dill underperforms. Here's a quick diagnostic guide for the most common problems:
| Symptom | Likely Cause | Solution |
|---|---|---|
| Yellowing lower leaves | Nitrogen deficiency or waterlogging | Apply Amino Power Powder; check drainage |
| Pale overall color, slow growth | General nutrient deficiency | Apply Fish & Kelp Liquid Blend; test soil pH (ideal: 5.5–6.5) |
| Yellowing between leaf veins | Magnesium deficiency | Apply Cal-Mag Extreme as soil drench |
| Bolting after only 4–5 weeks | Heat stress, drought, or bolt-prone variety | Switch to Fernleaf or Hera variety; apply kelp foliar; keep soil consistently moist |
| Sparse, leggy growth | Insufficient light (<6 hrs/day) or overcrowding | Move to sunnier location; thin to 8–12" spacing |
| Bitter, harsh flavor | Harvested post-bolt or heat-stressed plant | Harvest younger foliage next time; start fresh succession planting |
| Slow regrowth after harvest | Insufficient post-harvest nutrition | Apply Fish & Kelp or Amino Power within 48 hours of cutting |
| White powdery coating on leaves | Powdery mildew (fungal) | Improve air circulation; reduce overhead watering; apply diluted neem solution |
Frequently Asked Questions
How often can I harvest dill from the same plant?
Every 10–14 days during the active growing season, as long as you never take more than one-third of the plant's total foliage at once. With good nutrition and regular harvesting, a single plant can be harvested 5–8 times before it bolts.
Will dill grow back after cutting?
Yes — if you cut correctly. Always leave several inches of stem with at least one visible node or side shoot. Cutting below all growth nodes will prevent regrowth. Follow the one-third rule and your plant will rebound within 1–2 weeks.
Can I harvest dill and use it right away, or does it need to "rest"?
Use it immediately for the best flavor. Fresh dill reaches its aromatic peak within hours of harvesting, so there's no reason to wait. If you're not using it right away, store it in a jar of water in the refrigerator immediately after cutting.
Should I fertilize dill the same way I fertilize vegetables?
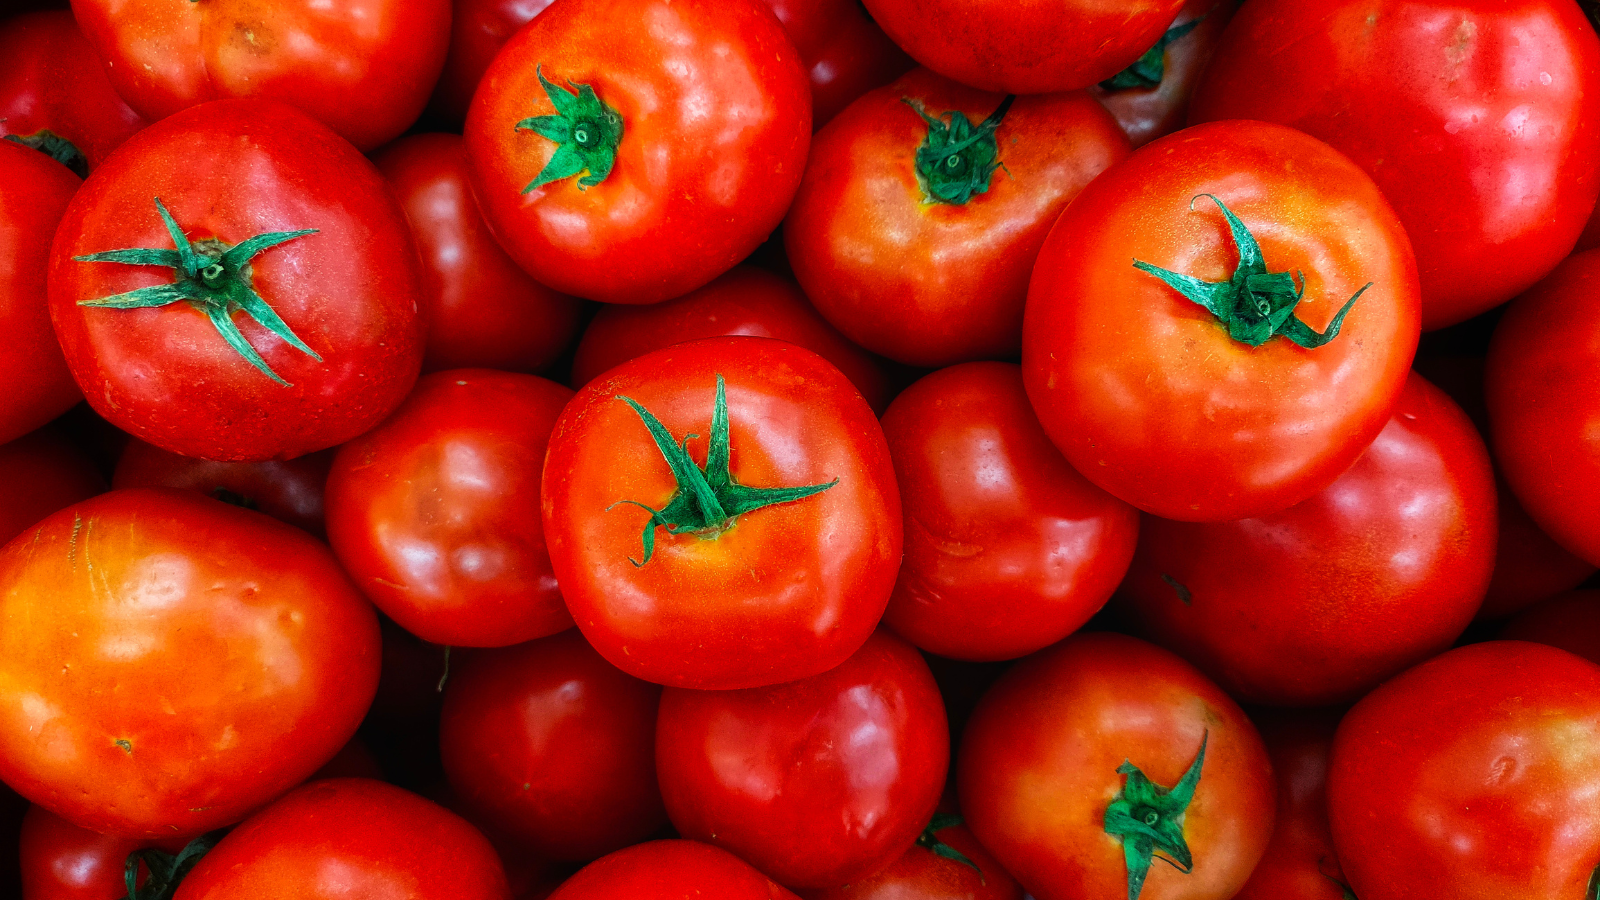
Dill needs less fertilizer than heavy-feeding vegetables like tomatoes or corn, but it still benefits significantly from regular, light applications of organic liquid fertilizers. The goal is steady, consistent nutrition — not aggressive feeding. Avoid high-phosphorus formulas during the vegetative stage, as these can push the plant toward flowering prematurely.
My dill is flowering — is it too late to harvest the leaves?
Not at all. Once dill starts flowering, the leaf flavor changes and becomes slightly more bitter, but the leaves are still usable — especially for cooking (as opposed to using raw). Harvest everything you can from the remaining foliage while letting the flower heads develop for pickling or seed collection.
Can I grow dill indoors?
Yes, but dill needs at least 6–8 hours of direct light per day — a south-facing window or a grow light is essential. Container-grown dill also dries out faster and benefits from more frequent, lighter feeding. The Fernleaf variety is particularly well-suited to indoor growing due to its compact size and slower bolt habit.
How do I know if my dill is getting enough nutrients?
Healthy dill should be a deep blue-green with strong, upright stems and a pronounced aroma when touched. Pale coloring, slow growth, or thin stems are the first indicators of nutritional gaps. A consistent program of organic liquid fertilizers — like those from GS Plant Foods — applied on a 2-week rotation gives you a simple, reliable baseline that prevents most deficiency issues before they start.
Conclusion: Harvest Well, Feed Well, Repeat
Growing dill for a full season of harvests isn't complicated — but it does require paying attention. The plants tell you everything you need to know if you're watching: the color of the fronds, the rate of growth, the speed at which the central stalk is thickening. When you respond to those cues with the right harvest timing and the right nutrition, you get an herb garden that produces at a level most gardeners never experience.
The principles here apply whether you're growing a single pot of Fernleaf dill on an apartment balcony or a full herb bed supplying a restaurant kitchen. Regular harvests. Smart succession planting. Organic, bioavailable nutrition that supports the soil as much as the plant. That's the system that works — and it's the same philosophy GS Plant Foods has been built around since 2008.
If you take one thing from this guide: start harvesting earlier than you think you should, and feed your plants within 48 hours of every major cut. Do those two things consistently, and your dill will reward you with fresh fronds from late spring clear through to the first hard frost.
Share:
When is Cherry Season? Why Your Winter Fertilizer Schedule Decides the Answer
Best Fertilizer for a Vegetable Garden: Complete Guide for Healthy Growth